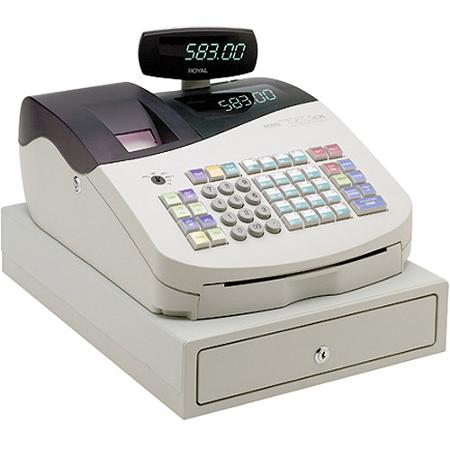
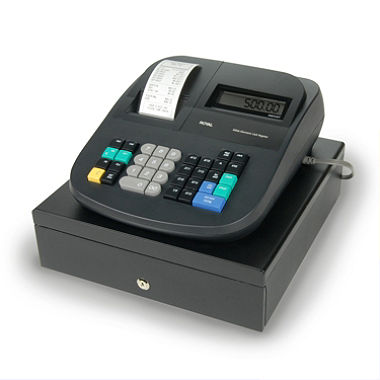
The memory of a Royal cash register stores a wide range of data, including transactions, price look-up codes and other programming options you chose during setup. When you perform a Full System Clear, you remove all this information and restore the cash register to its original factory default settings. This must be done when a manager forgets a pass code or the register malfunctions and troubleshooting doesn't correct the issue. The method you use to erase the memory depends on the Royal cash register model you’re using.
Royal 100 to 400 Series
Step 1 For Erase the Memory on a Royal Cash Register
Turn your Royal cash register off without unplugging it. Slide the control switch up to the “Off” position.
Step 2 For Erase the Memory on a Royal Cash Register
Open and remove the printer cover, and set it aside. Remove the paper roll, and set it aside. Open and remove the battery compartment cover, and set it aside.

Step 3 For Erase the Memory on a Royal Cash Register
Look at the batteries in the slots and note the orientations -- positive and negative marks -- of the batteries in each slot. Pull the batteries out of the slots and set them aside.
Step 4 For Erase the Memory on a Royal Cash Register
Unplug your cash register, wait at least 20 minutes, and then plug it in again. Slide the control switch to the “R1” or “R2” position.
Step 5 For Erase the Memory on a Royal Cash Register
Insert the backup batteries into the slots in the battery compartment so that the marks on the batteries match the original positions.
Step 6
Return the battery cover, paper roll and printer cover to the cash register, in that order.
Step 7
Select a mode using the control switch and then reprogram the register as needed with your settings.
Erase the Memory on a Royal Cash Register For Royal Alpha Series
Step 1
Turn off your Royal cash register. Flip the “Mode” key left or right to the center “Off” position.
Step 2
Open and remove the printer cover, and set it aside. Remove the paper roll and roller bar. Remove the battery compartment cover, and set it aside.

Step 3
Note the orientation of the first back-up battery within its slot. Pull the battery, and set it aside.
Step 4
Unplug your cash register, wait at least five minutes, and then plug it in again.
Step 5
Return the battery to its slot, and then return battery cover, paper roll and printer cover to the register, in that order.
Step 6
Select a mode, using the “Mode” key, and then reprogram your register as needed.
Related Reading :
- How to Buy a Cash Register
- Cash Register Scanner
- Cash Register Paper
- How to Turn Your Computer Into a Cash Register
Tip
If you can’t get your Royal cash register to function after completing a Full System Clear, repeat the steps, but use new batteries. For example, replace all Royal 100 to 400 series batteries with new ones. If you have an Alpha series register, pull all Alpha Series batteries instead of only one, and then replace the batteries.
Warning
Always make certain that your Royal cash register is plugged in to an electrical source when you insert the backup batteries.
Royal 100 to 400 Series
Step 1 For Erase the Memory on a Royal Cash Register
Turn your Royal cash register off without unplugging it. Slide the control switch up to the “Off” position.
Step 2 For Erase the Memory on a Royal Cash Register
Open and remove the printer cover, and set it aside. Remove the paper roll, and set it aside. Open and remove the battery compartment cover, and set it aside.

Look at the batteries in the slots and note the orientations -- positive and negative marks -- of the batteries in each slot. Pull the batteries out of the slots and set them aside.
Step 4 For Erase the Memory on a Royal Cash Register
Unplug your cash register, wait at least 20 minutes, and then plug it in again. Slide the control switch to the “R1” or “R2” position.
Step 5 For Erase the Memory on a Royal Cash Register
Insert the backup batteries into the slots in the battery compartment so that the marks on the batteries match the original positions.
Step 6
Return the battery cover, paper roll and printer cover to the cash register, in that order.
Step 7
Select a mode using the control switch and then reprogram the register as needed with your settings.
Erase the Memory on a Royal Cash Register For Royal Alpha Series
Step 1
Turn off your Royal cash register. Flip the “Mode” key left or right to the center “Off” position.
Step 2
Open and remove the printer cover, and set it aside. Remove the paper roll and roller bar. Remove the battery compartment cover, and set it aside.

Note the orientation of the first back-up battery within its slot. Pull the battery, and set it aside.
Step 4
Unplug your cash register, wait at least five minutes, and then plug it in again.
Step 5
Return the battery to its slot, and then return battery cover, paper roll and printer cover to the register, in that order.
Step 6
Select a mode, using the “Mode” key, and then reprogram your register as needed.
Related Reading :
- How to Buy a Cash Register
- Cash Register Scanner
- Cash Register Paper
- How to Turn Your Computer Into a Cash Register
Tip
If you can’t get your Royal cash register to function after completing a Full System Clear, repeat the steps, but use new batteries. For example, replace all Royal 100 to 400 series batteries with new ones. If you have an Alpha series register, pull all Alpha Series batteries instead of only one, and then replace the batteries.
Warning
Always make certain that your Royal cash register is plugged in to an electrical source when you insert the backup batteries.
How to Erase the Memory on a Royal Cash Register ?
4/
5
Oleh


